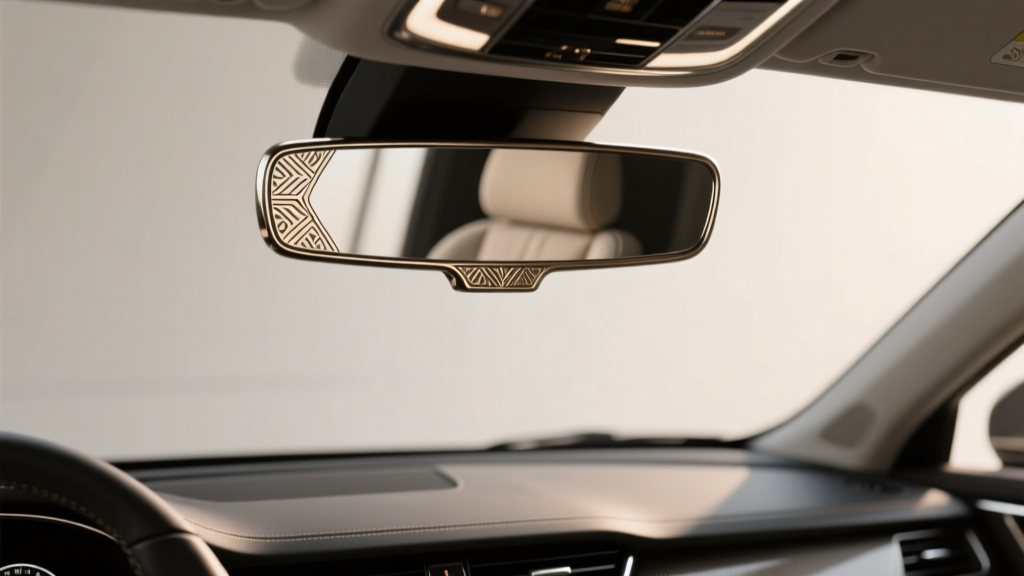
Mirror Cover Customization: Best Options (2026)
Mirror covers are one of those small upgrades that can make your car feel noticeably more ?yours? the moment you open the door. Whether you?re aiming for a cleaner factory-plus look, a sporty carbon-fiber vibe, or something bold that matches your interior theme, custom mirror covers let you refresh a high-visibility area without a full interior overhaul.
They also matter for practical reasons. The right mirror cover can hide scuffs, protect against future wear, reduce glare, and even improve perceived cabin quality?especially on older vehicles where the mirror housing has faded, scratched, or started peeling.
This guide breaks down what mirror cover customization really involves, what materials and fitment options are worth your money, and how to install them cleanly. You?ll also get real-world tips, common mistakes to avoid, and a quick FAQ to help you buy confidently.
What ?Mirror Cover Customization? Means (Interior vs. Exterior)
When people say ?mirror cover,? they might mean different parts:
- Interior rearview mirror cover: A shroud, cap, or decorative wrap that changes the look of the rearview mirror housing inside the cabin.
- Exterior side mirror cap/cover: Often called ?mirror caps,? these are installed on the outside mirror shells. They?re not an interior part, but many owners customize them to match interior trim (carbon fiber accents, blacked-out themes, etc.).
- Mirror surround/trim pieces: Small interior trim components around the mirror mount (common on some trucks/SUVs) or integrated housings near sensors/cameras.
This buying guide focuses primarily on interior mirror cover customization, but many of the same fitment and material rules apply to exterior mirror caps too.
Why Customize Your Mirror Cover?
1) Style and cabin cohesion
Mirror covers are a ?visual anchor? in the cabin?front and center in your line of sight. Matching the mirror cover finish to your interior trim can make the whole interior feel more premium.
Real-world example: If your car has piano black trim and your mirror is a faded matte gray, a gloss black cover or wrap can make the mirror look factory-correct again.
2) Protection and longevity
- Helps protect from scratches (rings, keys, sunglasses impacts)
- Reduces UV-related fading on older plastics
- Acts as a sacrificial layer?easier to replace a cover than a full mirror assembly
3) Reduced glare and fingerprints
Some finishes (especially matte or satin) hide fingerprints and reduce reflections compared to glossy plastic. That?s a comfort upgrade you?ll notice every day.
Mirror Cover Types: Which One Fits Your Goals?
Snap-on hard covers
These are rigid caps that clip over the mirror housing. Quality ranges from excellent to ?rattly.?
- Best for: Quick transformations, durable surface, easy cleaning
- Watch for: Poor clip fitment, creaks, and interference with mirror buttons
Adhesive-backed covers (overlay style)
These attach using pre-applied double-sided tape (usually 3M-style). They?re common for both interior mirrors and exterior mirror caps.
- Best for: Easy DIY installs, no disassembly, decent durability
- Watch for: Tape failure from heat, bad prep, and misalignment (tape grabs fast)
Vinyl wrap kits (pre-cut or universal)
Wraps change the finish without adding thickness. A good wrap can look factory if applied carefully.
- Best for: Custom finishes, budget-friendly, easy to remove later
- Watch for: Lifting edges, wrinkles on complex curves, low-quality vinyl
Hydro-dip or custom paint
These are ?pro look? solutions when you want a specific pattern or perfect color match.
- Best for: High-end builds, unique designs, perfect matching
- Watch for: Cost, downtime, and durability if clear coat quality is poor
Materials and Finishes: What to Buy (and What to Skip)
Common materials
- ABS plastic: The most common. Good heat resistance and durability when molded well.
- PC/ABS blends: Often stronger and more impact-resistant; tends to fit better on quality parts.
- Real carbon fiber: Lightweight and premium, but expensive; ensure it?s true carbon, not a printed film.
- Carbon-look (printed/hydro-dipped): Cheaper ?CF style.? Can look great, but quality varies widely.
Finish options (and what they feel like day-to-day)
- Matte: Low glare, hides fingerprints, ?OEM+? vibe.
- Satin: A balanced look?more depth than matte, less smudge-prone than gloss.
- Gloss/piano black: Sharp and modern; shows dust and fingerprints quickly.
- Brushed metal look: Great for matching aluminum-style trim; check that it?s not overly shiny or ?toy-like.?
Tip: match your interior, not just your taste
If your cabin has soft-touch plastics and subdued trim, ultra-glossy finishes can look out of place. If you already have gloss trim, a gloss mirror cover can tie everything together.
Fitment Checklist: How to Avoid Buying the Wrong Mirror Cover
Fitment is where most mirror cover purchases go wrong. Before you click ?Buy,? verify these details:
- Mirror type: Standard, auto-dimming, frameless, integrated HomeLink/garage buttons, compass display, or camera-based mirror.
- Sensor/bulge location: Many mirrors have light sensors for auto-dimming. A cover must not block them.
- Button clearance: Ensure the cover doesn?t interfere with toggles, dimming switches, or micro-buttons.
- Mount style: Wedge mount, button mount, or custom OEM mount. Some covers are mount-specific.
- Vehicle year and trim: Mid-cycle refreshes can change mirror shapes even within the same model generation.
Practical buying move: Take a clear photo of your mirror from the front and the side, plus a photo of any buttons/sensors. Compare them to the seller?s listing photos. If the listing doesn?t show multiple angles, that?s a red flag.
Mirror Cover Customization: Step-by-Step Installation
Option A: Installing an adhesive-backed mirror cover (overlay)
- Clean thoroughly: Use interior-safe cleaner first, then wipe the mirror housing with isopropyl alcohol (70?90%) to remove oils.
- Dry fit before peeling: Align the cover and confirm sensor/button clearance.
- Warm the cabin: Tape bonds best around 70?90�F. In winter, warm the part with a hair dryer on low.
- Peel and place carefully: Peel a small section of the tape backing first, tack one edge, then work across.
- Apply pressure: Press firmly along edges and curves for 30?60 seconds.
- Let it cure: Avoid touching or adjusting for 24 hours so the adhesive can fully bond.
Option B: Installing a snap-on cover
- Inspect the clips: Make sure no clips are cracked or warped.
- Test alignment: Line it up without forcing it. If it needs excessive pressure, stop and re-check fitment.
- Snap evenly: Start from one side and work around the perimeter.
- Check for rattles: Tap lightly and drive on a rough road. If it creaks, a thin felt strip (automotive anti-rattle tape) can help.
Option C: Wrapping your mirror cover (vinyl)
- Choose quality vinyl: Look for cast vinyl from reputable brands for easier conforming on curves.
- Prep the surface: Clean, alcohol wipe, and ensure zero dust.
- Apply with gentle heat: Use a heat gun carefully?too much heat can stretch vinyl excessively and cause later shrink-back.
- Work from center outward: Use a squeegee to push air out, then wrap edges last.
- Post-heat edges: A light post-heat helps edges stay locked down.
Product Recommendations: What?s Worth Considering
Because mirror covers are highly vehicle-specific, the best ?product? is often a type paired with a reputable supplier. Here are smart picks by use case:
Best for most drivers: ABS adhesive-backed overlay cover
- Why: Fast install, minimal tools, good durability when tape and fitment are correct.
- Look for: Pre-installed automotive-grade tape, crisp edges, and listing photos showing sensor cutouts.
Best OEM-like feel: Snap-on molded cover with anti-rattle fit
- Why: Usually feels more ?integrated? than taped overlays.
- Look for: Molded ABS/PC-ABS, strong clips, and reviews mentioning ?no squeaks.?
Best budget customization: Quality vinyl wrap (satin or matte)
- Why: Lowest cost per change, removable, huge finish selection.
- Look for: Cast vinyl and enough extra material for re-tries.
Best premium build: Real carbon fiber cover (or pro hydro-dip + clear coat)
- Why: High-end appearance and uniqueness.
- Look for: UV-stable clear coat and consistent weave (for real carbon).
Common Mistakes to Avoid
- Buying based on model name only: ?Fits Civic? isn?t enough?verify year, trim, mirror features (auto-dimming, buttons, sensors).
- Skipping surface prep: Oils and interior dressings kill adhesion. Alcohol wipe is non-negotiable for taped covers and vinyl.
- Installing in cold weather: Adhesives harden and fail early. Warm the cabin and the part.
- Covering sensors or blocking buttons: Auto-dimming sensors need a clear view; some covers accidentally shade them.
- Overheating vinyl: Too much heat causes stretch and future lifting.
- Choosing ultra-gloss in a dusty environment: Looks amazing for five minutes, then shows every fingerprint. Consider satin if you want ?clean? with less maintenance.
Practical Tips for a Factory-Clean Result
- Match trim tones: If your interior trim is warm silver, a cool chrome finish can clash. Choose brushed or satin metallic for a more OEM look.
- Use anti-rattle tape: For snap-on pieces, a small strip of felt tape where plastic meets plastic can eliminate squeaks.
- Keep edges tight: For wraps, spend extra time on edges. Edge failure is the #1 reason wraps look ?cheap.?
- Test your seating position: Sit in your normal driving posture and check for glare or reflections before finalizing a glossy finish.
- Plan a theme: If you?re doing carbon-look on the mirror, consider matching subtle accents (steering wheel trim, center console, dash strip) so it looks intentional.
FAQ: Mirror Cover Customization
Will a mirror cover affect my auto-dimming rearview mirror?
It can if the cover blocks the forward-facing or rear-facing light sensor. Buy a cover designed for your exact mirror type and confirm sensor cutouts/clearances in photos.
Are adhesive mirror covers safe in hot weather?
They can be, as long as the tape is automotive-grade and the surface prep is done correctly. Heat is where cheap tape fails first. If you live in a very hot climate, prioritize reputable tape, warm-pressure application, and a 24-hour cure time.
Can I remove a taped mirror cover later?
Yes. Use gentle heat (hair dryer) and slow, steady pulling. Remove leftover adhesive with automotive adhesive remover safe for interior plastics, then re-clean with alcohol.
What?s better: a wrap or a hard cover?
If you want the easiest install and a durable surface, a hard cover is usually better. If you want maximum design flexibility and reversibility, vinyl wrap wins?especially for matte/satin finishes.
Do mirror covers fit universally?
Most do not. Universal wraps are the closest thing to ?fits all,? but hard covers and overlays are typically specific to mirror shape, sensor layout, and button configuration.
How do I keep a glossy mirror cover from looking dirty?
Use a clean microfiber towel and a mild interior detailer regularly. If fingerprints drive you crazy, consider switching to satin or matte?same upgraded look with far less visible smudging.
Next Steps: Buy Smart, Install Clean, Enjoy the Upgrade
Start by identifying your mirror type (auto-dimming, buttons, sensors), then choose a cover style that matches your skill level: adhesive overlay for easy DIY, snap-on for a more integrated feel, or vinyl wrap for maximum customization. Prioritize fitment details and surface prep, and you?ll avoid the most common headaches?rattles, peeling edges, and blocked sensors.
If you?re planning a broader interior refresh, pair your mirror cover customization with complementary upgrades like trim wraps, steering wheel accessories, or center console protection for a cohesive look.
Want more practical interior upgrade guides? Explore the latest how-tos, buying guides, and styling tips at carinteriormix.com.